Muitos usuários têm problemas em que o Steam não consegue baixar o seu tempo. Ele avisa que os servidores de conteúdo estão inacessíveis para download. É seguro dizer que esse problema não é causado por nenhum problema em particular por causa de muitas configurações dos usuários. Listamos algumas das soluções que incluem todos os métodos do Suporte Steam, bem como dos usuários.

Solução 1: Removendo configurações de proxy
Um servidor proxy é usado em organizações onde o acesso aberto à Internet é restrito. Um proxy é usado para rastrear a rede e fornecer um gateway alternativo para os usuários. As configurações de proxy geralmente se tornam um obstáculo quando o Steam tenta se conectar aos seus servidores para download.
Existem duas maneiras de desativar o proxy em seu computador.
Método 1: Chrome
- Abra o navegador Chrome e clique no menu Chrome (canto superior direito) ao abrir.

- Depois que o menu suspenso vier, clique em Configurações .

- Uma vez que a página Configurações é aberta, digite “ proxy ” na barra de diálogo presente no topo.

- Nos resultados da pesquisa, selecione o resultado que diz " abrir configurações de proxy ".

- Quando as configurações forem abertas, clique em “ Configurações da LAN ” na guia Conexões, presente na parte inferior.

- Desmarque a linha que diz “ Detectar configurações automaticamente ”. Salvar as mudanças e sair. Reinicie o Steam.

Método 2: por meio das configurações de rede
- Pressione o botão Windows + R para abrir o aplicativo Executar.
- Na caixa de diálogo, digite “inetcpl. cpl ”.

- As propriedades da Internet serão abertas. Navegue até a guia Conexões e clique nas configurações da LAN.
- Uma vez nas configurações da LAN, desmarque a linha que diz “ Detectar automaticamente as configurações” . Salve as alterações e saia para reiniciar o Steam.
Solução 2: desativando extensões do Chrome
Às vezes, as extensões presentes no Chrome podem criar um obstáculo real. Eles interferem nas configurações de rede, especialmente no complemento chamado “ Ghostery ”. Ele monitora sua rede e fornece estatísticas de onde você deixa sua pegada digital. Ele até permite que você controle quais sites podem acessar seus dados e quais não podem. É aconselhável desativar esses add-ons do Chrome antes de prosseguir com o download. Se o problema estivesse sendo causado por eles, estaria resolvido.
Isso não inclui apenas as extensões do Chrome, você deve desabilitar QUALQUER programa relacionado à sua rede (monitor de dados, VPNs, etc.). É melhor tentar do que prosseguir com as soluções adicionais que são mais complexas.

Solução 3: Alterar sua região de download
Uma das correções básicas inclui a alteração da região de download.
O sistema de conteúdo do Steam é dividido em diferentes regiões. O cliente detecta automaticamente sua região por meio da rede e a define como padrão. Às vezes, os servidores em uma região específica podem estar sobrecarregados ou podem estar passando por falha de hardware. Assim, alterar a região de download pode resolver o problema em questão. Você sempre pode tentar alterar as regiões de download várias vezes (não é limitado apenas a uma tentativa) antes de prosseguir com outras soluções.
- Abra o Steam e clique em ' Configurações ' no menu suspenso no canto superior esquerdo da janela.
- Selecione ' Downloads ' e navegue até ' Baixar região '.
- Selecione outras regiões diferentes da sua e reinicie o Steam.

Solução 4: Excluindo clientregistry.blob
O registro do cliente do Steam pode ficar corrompido e essa pode ser a razão pela qual você está enfrentando o erro. Podemos tentar renomeá-lo / excluí-lo.
- Saia completamente do Steam e termine todas as tarefas conforme mencionado na solução acima.
- Navegue até o diretório do Steam. O padrão é C: \ Arquivos de programas \ Steam .
- Localize ' clientregistry.blob' .

- Renomeie o arquivo para ' clientregistryold.blob ' (ou você pode excluir o arquivo completamente).
- Reinicie o Steam e permita que o arquivo seja recriado.
Esperançosamente, seu cliente funcionará conforme o esperado. Se ainda não funcionar, siga as etapas listadas abaixo.
- Navegue de volta para o diretório do Steam.
- Localize 'Steamreporter. exe '.

- Execute o aplicativo e reinicie o Steam.
Solução 5: limpar a fila de download do Steam
Se você tiver muitos downloads pendentes em seu cliente Steam, é aconselhável remover todos eles, exceto um e reiniciar o Steam.
- Abra seu cliente Steam e vá para a guia Biblioteca .
- Na parte inferior, você verá uma opção clicável que diz “ Download pausado ”. Clique nele para que todas as opções da fila sejam apresentadas.

- Um por um, clique no botão conforme mostrado na imagem abaixo para remover os itens da fila.

- Depois de removê-los, clique com o botão direito nos jogos (exceto aquele que você deseja baixar primeiro) para que as configurações sejam apresentadas. Depois de abrir as configurações , clique no botão “ Desinstalar ”.

- O Steam solicitará que você confirme suas ações. Clique em Excluir quando for solicitado e reinicie o Steam antes de tentar baixar aquele jogo novamente.

Solução 6: usando a configuração de limpeza
Podemos tentar executar o comando flush config para redefinir a configuração. Siga os passos abaixo.
- Pressione Windows + R para abrir o aplicativo Executar.
- Na barra de diálogo, digite “ steam: // flushconfig ”.

- Pressione OK . O Steam agora abrirá uma janela para confirmar suas ações. Pressione Ok e reinicie o Steam.

Solução 7: Iniciando o Steam no modo de segurança com rede.
Before resorting to more technical methods, you can try running your PC in safe mode (with networking) and try to start the Steam download.
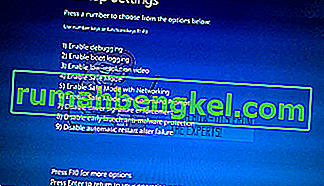
- Get your computer to safe mode by selecting from various options available. Select ‘Enable Safe Mode with Networking’. You can learn how to get your PC to safe mode from here. If you are running Windows 7, press F8 upon the startup of your PC and you will be directed to a similar window where you can select the required option.
- Open Steam and try updating/installing with it again. This method should remove all obstacles (if any) which your Steam may be experiencing.

Solution 8: Disabling Safe-web from router
Your WiFi router may have a setting called safe-web in it. What this does is filter all the incoming data it deems are not trustworthy. It is very common for it to flag Steam as one and disrupts the connection with your computer.
Since there are hundreds of different routers used by the users, it is very difficult to list the solution on how to disable the option for every one of them. Here are some guidelines so you can have an idea.
- Web Safe can be found in the parental control section on the WiFi router configuration.
- It can also be found on the Virus section or the Filtering section.
- To enter your router settings, type the IP which is associated with it (for example for some it is 192.168.1.1). You can check the required IP either by calling your modem provider or by looking at the back of the device ( even its packaging box may have details).
Solution 9: Disabling Anti-virus and Defender/firewall
Before proceeding to reinstall Steam, we can try meddling with the antivirus. Antivirus monitors each packet of your computer sends and receives. Although Steam has collaborated with most of them so they don’t give problems, sometimes they do. The solution is to disable/uninstall them and check if you are able to download then.
McAfee Antivirus:
McAfee has no way to exclude certain files from its real time scanning. The only way is to disable the antivirus entirely until the game is updated. To do this, open McAfree and select “Virus and Spyware Protection”. Here you find the option of “Real-Time Scanning”. Click that option and turn it off.

Then follow the following instruction to verify integrity of game files.
- Restart your computer and relaunch Steam.
- Head over to the library section and right click on the game which is giving you problems.
- Click on its properties and select the local files tab.
- Click the verify integrity of game files button and Steam will verify that game in a few minutes.
Hopefully, after performing the above steps, your Steam won’t give any issue.

ESET NOD32
NOD32 has the tendency to mark some application files as malicious and will most probably quarantine it. This often results in the error while updating a game. Browse to your current Steam directory and copy the address
- The default location for your steam folder should be “C:\Program Files (x86)\Steam”.
Press ⊞ Win + R button. This should pop-up the Run application.
In the dialogue box write “C:\Program Files (x86)\Steam”.

Or if you installed Steam in another directory, you can browse to that directory and you can proceed with steps mentioned below.
After copying the address open ESET NOD32 and paste the location in exclude from real time scanning.
Follow the ‘verify integrity of game files’ method listed above and you will be all good.

Kaspersky AV
Kaspersky may sometimes flag Steam as an intruder and disable it from making any changes to the hard drive. To fix this, head over to ‘threats and exclusions’. Navigate to ‘trusted zone’ and add Steam.exe as a trusted application. Remember to change the settings to Do not restrict application activity as well as Do not scan opened files.
Follow the ‘verify integrity of game files’ method listed above and restart your computer.

Windows Defender
- Click Windows button and in the search bar type “Windows defender”. Among all the options, there will be an application named “Windows Defender Security Center”. Open it.
- Upon opening, you will find a list of options available in the new window. Select the option “Virus and threat protection”.

- Upon entering the menu, navigate to Virus and Threat Protection Settings. Windows may prompt you to allow administrator access to use this feature. If so, press Yes.

- After entering the required menu, you should search the window which says “Add or remove exclusions”. Click it and you will be navigated to a menu where you can add exclusions. You can exclude folders, extensions, and even files. In this case, we will exclude the whole Steam folder which is located in the directory you downloaded it.

- Click on the option which says “Exclude a folder” and navigate to your Steam directory. The default location for your steam folder should be “C:\Program Files (x86)\Steam”. Once you reach the location select the folder and save changes.
- Restart your computer and run Steam with administrative privileges. Hopefully, your speed issue will be resolved.
Solution 10: Downloading Latest Steam Client
- The default location for your steam folder should be “C:\Program Files (x86)\Steam”.
Press ⊞ Win + R button. This should pop-up the Run application.
In the dialogue box write “C:\Program Files (x86)\Steam”.

Or if you installed Steam in another directory, you can browse to that directory and you can proceed with steps mentioned below.
- Locate the following folders:
Steam.exe (Application)SteamApps (Folder)Userdata (Folder)
- Delete all the other files/folders/applications except the ones mentioned above.
- Head over to the Steam website and download the latest Steam client. Don’t launch the old Steam.exe present in your directory at all. The problem won’t be solved.
- Install Steam using the installer in the same directory as your previous one. Hopefully, after installation, the problem will be solved.
Solution 11: Changing Default Browser
In a weird turn of events, having Chrome or any other browser set as the default browser sometimes causes issues with the download request that Steam sends to its servers. Therefore, in this step, we will be setting internet explorer as our default browser temporarily to make sure that the download proceeds. For that:
- Press “Windows’ + “I” to open settings.
- In settings, click on “Apps” and then select “Default Apps” from the left pane.
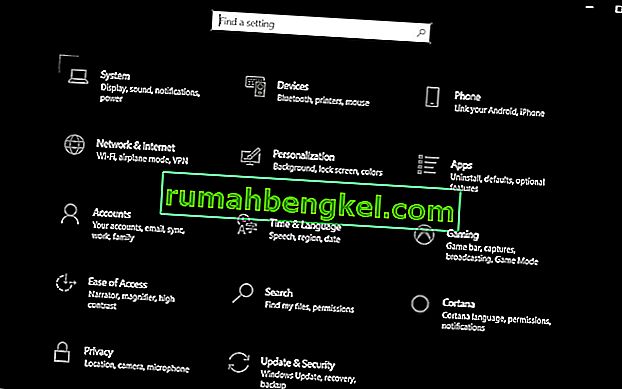
- Click on the “Web browser” option and then select “Internet Explorer” from the list.
- Open Steam and check to see if the issue persists.

Solution 12: Removing Steam Content Server Limiter
In certain cases, it was shown that uninstalling Steam Content Server Limiter from the Classical Control Panel interface fixes this issue for a lot of people. Therefore, in this step, we will be doing exactly that. For that:
- Press “Windows’ + “R” to open the Run prompt.
- Type in “Control” and press “Enter”.

- Click on the “Uninstalla Program” option and then right-click on the “Steam Content Server Limiter” and select “Uninstall”.
- After the server limiter is uninstalled, check to see if the issue persists.

Method 13: Changing DNS
In certain situations, the server DNS that the computer is using to communicate with the internet might not be compatible either with the steam servers or it might be facing issues temporarily. Therefore, in this step, we will be changing our DNS servers. For that;
- Press “Windows’ + “R” to open the Run prompt.
- Type in “ncpa.cpl” and press “enter”.

- Right-click on your network adapter and select “Properties”.
- In properties, double click on the “Internet Protocol Version 4(TCP/IPV4)” option and check the “Use following DNS Addresses” option.
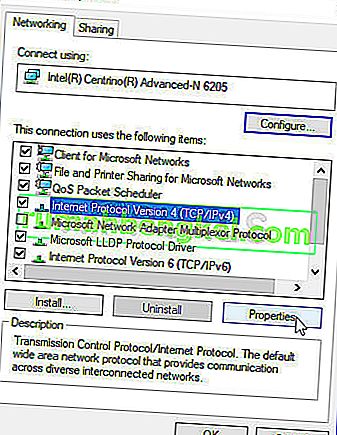
- Type in “8.8.8.8” in the primary DNS address and “8.8.4.4” in the secondary DNS address.
- Click on “OK” and then check to see if the issue persists. If it does, try using “1.1.1.1” and “1.0.0.1” in the fields respectively.


Method 14: Changing Config File
In certain situations, the config file on the computer might require some editing in order to get it some games to start working. The steps listed below are primarily for Mac but you can try them on some older OS such as Windows XP too as some users reported that this fixed it for them.
- Open the Mac Finder and navigate to the following directory.
drive_c/Program Files/Steam/config/
- Launch the “config.vdf” file and wait for it to open.
- Find the following text lines inside the file.
"InstallConfigStore" { "Software" { "Valve" { "Steam" "cip" - Paste the following lines of code under the “cip” entry in the config after creating a new line under it.
CS" "valve511.steamcontent.com;valve501.steamcontent.com;valve517.steamcontent.com;valve557.steamcontent.com;valve513.steamcontent.com;valve535.steamcontent.com;valve546.steamcontent.com;valve538.steamcontent.com;valve536.steamcontent.com;valve530.steamcontent.com;valve559.steamcontent.com;valve545.steamcontent.com;valve518.steamcontent.com;valve548.steamcontent.com;valve555.steamcontent.com;valve556.steamcontent.com;valve506.steamcontent.com;valve544.steamcontent.com;valve525.steamcontent.com;valve567.steamcontent.com;valve521.steamcontent.com;valve510.steamcontent.com;valve542.steamcontent.com;valve519.steamcontent.com;valve526.steamcontent.com;valve504.steamcontent.com;valve500.steamcontent.com;valve554.steamcontent.com;valve562.steamcontent.com;valve524.steamcontent.com;valve502.steamcontent.com;valve505.steamcontent.com;valve547.steamcontent.com;valve560.steamcontent.com;valve503.steamcontent.com;valve507.steamcontent.com;valve553.steamcontent.com;valve520.steamcontent.com;valve550.steamcontent.com;valve531.steamcontent.com;valve558.steamcontent.com;valve552.steamcontent.com;valve563.steamcontent.com;valve540.steamcontent.com;valve541.steamcontent.com;valve537.steamcontent.com;valve528.steamcontent.com;valve523.steamcontent.com;valve512.steamcontent.com;valve532.steamcontent.com;valve561.steamcontent.com;valve549.steamcontent.com;valve522.steamcontent.com;valve514.steamcontent.com;valve551.steamcontent.com;valve564.steamcontent.com;valve543.steamcontent.com;valve565.steamcontent.com;valve529.steamcontent.com;valve539.steamcontent.com;valve566.steamcontent.com;valve165.steamcontent.com;valve959.steamcontent.com;valve164.steamcontent.com;valve1611.steamcontent.com;valve1601.steamcontent.com;valve1617.steamcontent.com;valve1603.steamcontent.com;valve1602.steamcontent.com;valve1610.steamcontent.com;valve1615.steamcontent.com;valve909.steamcontent.com;valve900.steamcontent.com;valve905.steamcontent.com;valve954.steamcontent.com;valve955.steamcontent.com;valve1612.steamcontent.com;valve1607.steamcontent.com;valve1608.steamcontent.com;valve1618.steamcontent.com;valve1619.steamcontent.com;valve1606.steamcontent.com;valve1605.steamcontent.com;valve1609.steamcontent.com;valve907.steamcontent.com;valve901.steamcontent.com;valve902.steamcontent.com;valve1604.steamcontent.com;valve908.steamcontent.com;valve950.steamcontent.com;valve957.steamcontent.com;valve903.steamcontent.com;valve1614.steamcontent.com;valve904.steamcontent.com;valve952.steamcontent.com;valve1616.steamcontent.com;valve1613.steamcontent.com;valve958.steamcontent.com;valve956.steamcontent.com;valve906.steamcontent.com"
- Save your changes and check to see if the issue persists.
Note: Some users reported to fix the issue after having to deleting the CM List IP addresses in the file aswell in addition to pasting this code.