O erro 0xc000000e ao tentar inicializar o Windows significa que você está lidando com dados de configuração de inicialização corrompidos . Os dados de configuração de inicialização são um armazenamento global para todas as opções e configurações relacionadas à inicialização em PCs com Windows mais recentes.
Você receberá esse erro ao tentar inicializar o dispositivo e será exibida uma tela preta com instruções sobre como reparar o computador usando um disco de instalação ou uma unidade de recuperação. Infelizmente, ter essa unidade de recuperação é a única maneira de resolver esse problema, então você deve colocar as mãos em uma antes de começar. Se você não tiver, é bastante fácil criar um usando a ferramenta Rufus ou Windows Media Creation de qualquer outro PC ou laptop.

Você também precisará inicializar em seu BIOS para alterar a ordem de inicialização e fazer o PC inicializar a partir da unidade de recuperação em vez do disco rígido. Para fazer isso, use as seguintes etapas:
- Entre nas configurações do BIOS ou UEFI pressionando a tecla designada do fabricante da placa-mãe antes de inicializar o Windows. Essa tecla geralmente é Esc, Delete, F2, F8, F10, F12 ou Backspace, dependendo do fabricante. Você pode fazer uma pesquisa online sobre como entrar no BIOS, seguido pelo modelo do seu computador.
- Uma vez lá dentro, navegue para o Boot Use as instruções encontradas no BIOS para mudar sua ordem de boot e defina o CD-ROM ou a porta USB como o primeiro dispositivo, dependendo se sua unidade de recuperação é um CD ou uma unidade flash .
- Salve suas configurações e saia.

Método 1: reconstruir os dados de configuração de inicialização
Para fazer isso, você precisará inicializar o computador a partir da unidade de recuperação. Se você configurou seu BIOS com as etapas acima, você pode fazer isso pressionando qualquer tecla quando o prompt aparecer em sua tela. Depois que o computador for inicializado a partir da unidade de recuperação, use as seguintes etapas para reconstruir o BCD:
- Na caixa de diálogo Instalação do Windows , defina tudo com os valores apropriados, selecione seu idioma e clique em
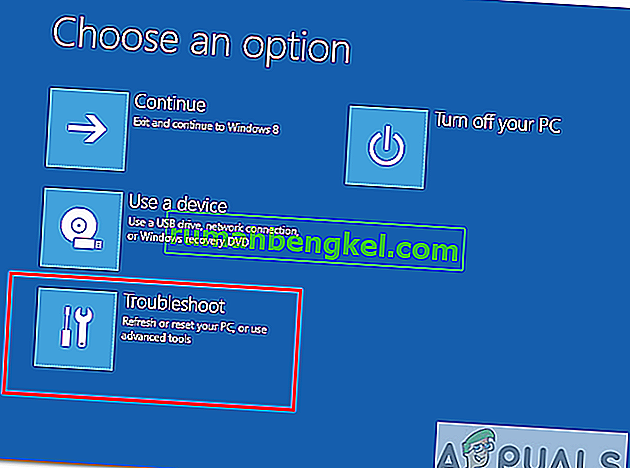
- No canto inferior esquerdo, clique em Reparar seu computador e escolha Solução de problemas na tela Escolha uma opção.
- Na tela Solução de problemas , clique em Opções avançadas e clique em Prompt de comando.
- Quando o Prompt de Comando for aberto, digite os seguintes comandos, pressionando Enter no teclado após cada um deles:
bootrec / scanos bootrec / fixmbr bootrec / fixboot bootrec / rebuildbcd
- Reinicie o computador e ele deve inicializar perfeitamente, sem enfrentar o problema novamente.

Método 2: reparar seu sistema operacional com a unidade de recuperação
Este método também reparará seu sistema operacional com o prompt de comando da unidade de recuperação e você poderá inicializar no Windows sem enfrentar o problema novamente. Inicialize a partir da unidade de recuperação e siga as instruções abaixo.
- Use as etapas 1 a 3 do método anterior para chegar ao prompt de comando da unidade de recuperação.
- Uma vez dentro do Prompt de Comando, digite os comandos abaixo, seguidos de Enter no teclado para executá-los. O utilitário StartRep.exe corrige os valores do ambiente de inicialização e deve corrigir o erro BCD. Observe que pode ser necessário repetir esta etapa várias vezes, caso ela falhe.
cd x: \ sources \ recovery StartRep.exe
- Se a etapa anterior de reparo do Windows não ajudar, digite bcdedit no Prompt de Comando para ver os valores do Gerenciador de Inicialização do Windows.
- Observe os valores de Device . Se eles forem desconhecidos , digite os seguintes comandos, cada um seguido por um Enter para executá-los. Observe que você deve substituir C: pela partição onde seu sistema operacional está instalado, se necessário.
bcdedit / set {DEFAULT.EN_US} device partition = c: bcdedit / set {DEFAULT.EN_US} osdevice partition = c: bcdedit / set {BOOTMGR.EN_US} device partition = c:- Quando o prompt de comando for concluído, feche-o, remova a unidade de recuperação e reinicie o sistema. Não deve haver problemas para inicializar agora.
A única desvantagem dessas soluções é que elas exigem um impulso de recuperação, paciência e nervos de aço. No entanto, se você segui-los como estão descritos, você deve corrigir o erro que está recebendo e continuar usando seu dispositivo como antes.
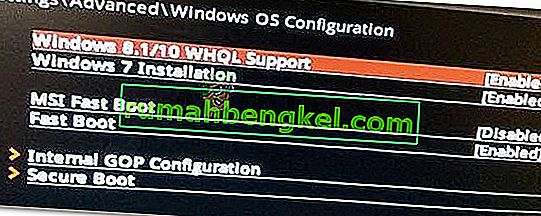
Método 3: Habilite o suporte WHQL do Windows 10 na BIOS
A configuração de suporte WHQL do Windows 10 existe em alguns dos OEMs. Ele tem duas funções básicas: verifica se há drivers assinados durante o processo de inicialização e permite que você habilite o suporte UEFI. Se você estiver usando o Windows 10, será necessário habilitá-lo para que o computador possa inicializar normalmente. No entanto, se não for selecionado, o computador pode inicializar com o erro 0xc000000e. Portanto, você pode acessar o BIOS para ver se a configuração de suporte WHQL do Windows 10 está habilitada. Se não, habilite-o para tentar.
Você deve observar que a configuração Windows 10 WHQL Support não é compatível com todos os computadores. Se o seu computador não tiver, você pode verificar se o suporte UEFI está habilitado no seu computador. Caso contrário, você pode habilitá-lo para ver se o código de erro 0xc000000e desaparece. Para habilitá-lo:
- Desligue o computador completamente e deixe-o descansar por pelo menos alguns minutos.
- Depois de se certificar de que o tempo adequado passou, reinicie o computador e você deverá observar a opção “ Pressione este botão para inicializar no modo BIOS ”.
- Pressione o botão para inicializar no modo BIOS.
- Após inicializar com sucesso dentro do modo Bios, verifique se há uma configuração Windows WHQL no Bios.
- Se estiver presente, pressione “Enter” para selecioná-lo após destacá-lo com as teclas de seta e selecione a opção “Ativado” para ativá-lo em seu computador.
- Verifique se isso resolve o problema.

Se o erro de inicialização 0xc000000e do Windows 10 ainda aparecer depois de habilitar a configuração de Suporte WHQL do Windows 10 ou suporte UEFI, pode ser necessário redefinir a configuração BIOS / UEFI em seu computador.
Método 4: reconstruir o BCD por meio do Easy Recovery Essentials
Easy Recovery Essentials é um recurso de reparo automatizado do sistema com um clique que incorpora o reparo completo e a reconstrução do BCD para resolver o erro “0xc000000e”, mesmo nos casos em que o Windows não inicializa como resultado do erro.
O componente de reparo de inicialização automatizado do EasyRE resolverá todos os problemas relacionados ao BCD, consertando o BCD ou recriando-o do zero usando a codificação e o caminho corretos para a partição que se recusa a carregar corretamente. Ele também marcará o disco como online para garantir que funcione corretamente.
O Easy Recovery Essentials tem a garantia de corrigir o erro “0xc000000e” automaticamente usando sua opção de Reparo Automatizado integrada. EasyRE está atualmente disponível para Windows XP, Vista, 7, 8, 10 e pode ser baixado e criado em qualquer PC.
- Consiga outro computador que você possa usar para criar um USB que usaremos para inicializar o computador.
- Baixe Easy Recovery Essentials aqui.

- Grave a imagem.
- Inicialize seu PC a partir do CD ou USB Easy Recovery Essentials que você criou.
- Assim que o EasyRE estiver em execução, escolha a opção “Reparo automatizado” e clique em Continuar.
- Após o EasyRE verificar as unidades do seu computador, identifique e selecione a letra da unidade para a instalação do Windows na lista e, a seguir, clique na opção de reparo automatizado para começar.
- O Easy Recovery Essentials começará a analisar a unidade selecionada em busca de problemas. EasyRE testará e tentará corrigir erros automaticamente com o disco, partição, setor de inicialização, sistema de arquivos, carregador de inicialização e registro. Nenhuma intervenção é necessária, pois o reparo do EasyRE é totalmente automatizado.
- Assim que o processo for concluído, o EasyRE relatará suas descobertas. Clique no botão Reiniciar para reinicializar seu PC e testar as alterações.

Método 5: redefinir a configuração do BIOS / UEFI
Alguns usuários disseram que o problema do erro 0xc000000e foi resolvido redefinindo a configuração do BIOS / UEFI. Portanto, você pode tentar esse método para ver se esse problema pode ser resolvido.
Etapa 1. Abra o menu BIOS
Para redefinir o BIOS para as configurações padrão, você precisa acessar o menu do BIOS e encontrar a opção Configurações padrão primeiro.
Os usuários do Windows 10 podem acessar as opções de inicialização avançadas do Windows 10 e entrar no menu do BIOS. Você pode clicar em Iniciar -> Energia, pressionar e segurar a tecla Shift e clicar no botão Reiniciar para reiniciar o Windows no Ambiente de Recuperação do Windows. Em seguida, clique em Troubleshoot -> Advanced Options -> UEFI Firmware Settings e clique em Restart para entrar na tela de configurações do BIOS.
Alternatively, you can also restart your computer normally and press the required key in the startup screen to boot into the BIOS settings window. The hotkey is varied from different computer manufacturers, and it could be F12, Del, Esc, F8, F2, etc.
Step 2. Find the Setup Defaults Option
The name and location of the “Setup Defaults” option may be different from various computers. It generally calls like: Load Default, Load Setup Defaults, Load Default Settings, Load BIOS Defaults, Load Optimal Defaults, etc.
Use the arrow keys on the computer keyboard to find the BIOS setup default option in the BIOS settings screen. You may find it in one of the BIOS tabs.
Step 3. Reset BIOS
After you find the Load Setup Defaults option, you can select it and press the Enter button to start resetting the BIOS to factory default settings in Windows 10.
At last, you can press F10 to save and exit BIOS. Your computer will automatically reboot. If you need to change BIOS settings again in the future, you can follow the same instructions to access BIOS again to change it.
Method 6: Mark Boot Disk As Online
It is possible in some cases, that the disk that you have connected to the computer or the USB that you are trying to boot from has been marked as offline by the computer. Some computers tend to prevent extra applications, hardware, and other things from being able to run as soon as the computer starts because it allows for more convenient and fast startup experience. Therefore, in this step, we will be marking the Disk as online.
You still need to use a bootable USB medium to do this job. We will show you a step-by-step guide here:
- After booting your computer from the bootable USB drive, you need to go to Next > Repair your computer. Then, you will enter WinRE.
- Go to Troubleshoot > Advanced options > Command Prompt.

- Make sure to properly enter your login credentials if you are asked by the computer.
- Type in the following command inside the command prompt to successfully launch the disk part utility on your computer.
diskpart
- Type in either one of the following commands in the next window to list the currently connected disk drives to your computer.
List Disk List Volume
- Once the disks have been listed, you need to identify the disk that contains the Windows operating system and the one that you want to mark as active.
- After identifying it, select the disk using the following command and replacing the alphabet with the driver letter of that disk.
select disk A Select Volume A (Replace A with the Drive Letter)
- After you have successfully selected the disk, you must mark the disk as online in order to initiate the recognization process of the disk at startup. Use the following commands to do that.
Online Disk Online Volume
- Type in the following command to successfully get out of the command prompt and restart your computer after that.
Exit
- Check to see if marking the Disk as online has fixed your issue.

Method 7: Check your data cables, BIOS and drivers
Unplug all HDD data cables, and then plug them again. Revert to the previous drivers and BIOS settings if they were changed, or use “Restore factory settings” option in the BIOS. Make sure to write down all current BIOS settings that were previously selected, just in case it is required to switch back. If the error is caused by a change of the SATA disk controller’s mode in the BIOS or firmware, the fix can be as simple as entering the BIOS and toggling the SATA controller’s “mode” setting. The exact instructions differ from one manufacturer to the other, but the options will resemble what is shown in the screenshots below.
To check the boot order, follow these steps:
- Restart the computer
- Press the necessary key to open the BIOS menu. This key depends on the computer manufacturer and computer model. This is usually listed on the first screen that appears on the monitor. It can be any of the following: Esc, Del, F2, F8, F10 or F12.
- If the screen shows multiple keys, find the key to open “BIOS”, “setup” or “BIOS menu”
- Attempt to toggle between all three (or more) modes until a combination that results in Windows booting successfully once more is found.
Method 8: Boot Windows In Safe Mode
If above solutions didn’t fix the problem, then Start Windows into safe mode. This will start your PC with minimum system requirements, will not load startup programs, add-ons etc. And allow performing troubleshooting steps to fix Boot Error 0xc000000e:
Before you enter the safe mode, you need to enter the Windows Recovery Environment (winRE). To do this, you will repeatedly turn your device OFF, then ON:
- Hold down the power button for 10 seconds to turn off your device.
- Press the power button again to turn on your device.
- On the first sign that Windows has started (for example, some devices show the manufacturer’s logo when restarting) hold down the power button for 10 seconds to turn off your device.
- Press the power button again to turn on your device.
- When Windows restarts, hold down the power button for 10 seconds to turn off your device.
- Press the power button again to turn on your device.
- Allow your device to fully restart and you should boot into the Windows Recovery Environment.
Now that you are in the Windows Recovery Environment, you will follow these steps to take you to safe mode:
- On the Choose an option, screen, select “Troubleshoot” and then “Advanced options.”
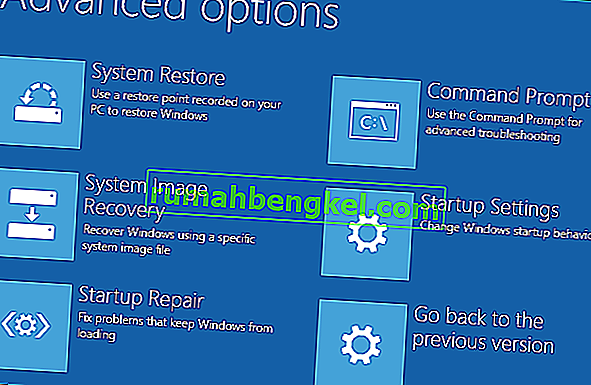
- Now click on “Startup Settings” and click on “Restart.”
- After your device restarts, you’ll see a list of options. Select option “4” from the list or press “F4” to enter Safe Mode.

Note: If you need to exit safe mode, simply restart your device, or:
- Press the “Windows logo key + R.”
- Type “msconfig” in the Run box and then select “OK”.

- Select the Boot tab and under Boot options, clear the Safe boot checkbox.

Method 9: Check your disk with CHKDSK utility
If the hard drive has its file integrity compromised, it is possible to use built-in Windows CHKDSK utility to scan the disk and fix the file system errors.
- Connect a USB drive that has been made bootable or insert the Windows Installation Disk on your computer.
- After connecting one of these, boot from that connected device.
- After booting your computer from the device, click on “Next” and then on the “Repair your Computer” option.
- On the next window, click on “Troubleshoot” and then on the “Advanced” Option.

- On the next screen, make sure to select the “CommandPrompt” option to successfully launch into the command prompt.
- Provide the login credentials of your account in order to boot inside the cmd.
- Inside the command prompt, type in the following command to successfully run the check disk utility on your computer.
chkdsk C: /f (Make sure to replace the "C" with the Drive letter of your partition).
- Confirm any on-screen prompts and wait for the scan to be fully completed.
- Check to see if the issue is fixed by performing this step.
Method 10: Disable fast startup Feature
If your computer has been set up to use the Fast Startup feature, you might be getting this error message on your screen because of doing so. The Fast Startup feature is known to malfunction with some operating systems and hardware combinations.
Basically, when enabled, the feature automatically sends some launch configurations to be stored in your RAM to allow for a faster startup as indicated by its name but this configuration data can sometimes be corrupted which can lead to this error on your computer. Therefore, in this step, we will be disabling it completely. For that:
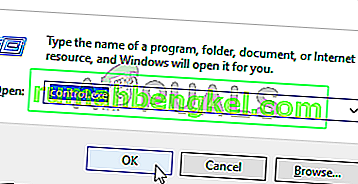
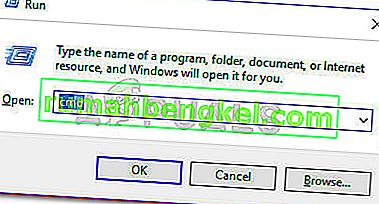
- Press “Windows” + “R” to open the Run prompt.
- Type in “Control Panel” and press “enter” to launch the classical Control Panel interface.
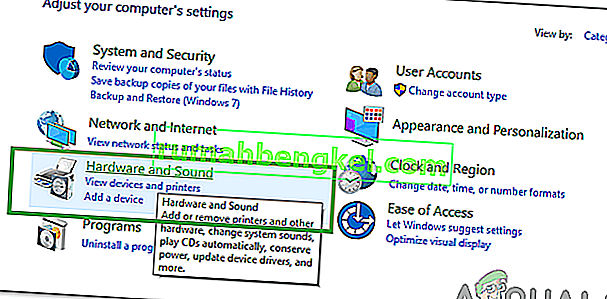
- Inside the control panel, click on the “Hardware and Sound” option and then select the “Power Options” button.
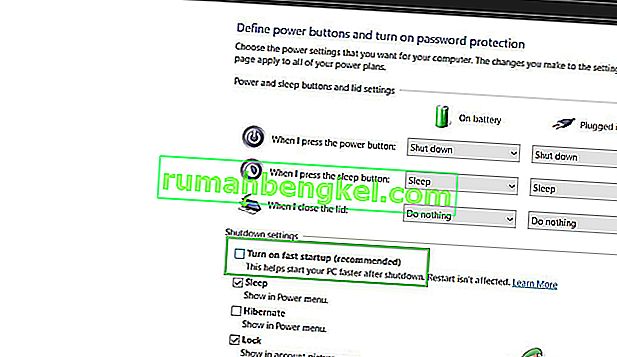
- Inside the power options, click on the “Choose what the power button does” from the left side.
- Click on the “Change Settings” option if the fast startup option is greyed out.
- Make sure to uncheck the “Turn on Fast Startup” option and save your changes.
- Closeout of the window and terminate any unnecessary applications.
- Click on the “Start Menu”, click on the “Power Options” and select “Shutdown” from the list.
- This option should completely power down your computer and after performing a complete shutdown, wait for some minutes before turning your computer back on.
- After the computer turns back on, check to see if the error message is fixed.
Note: This solution can only be applied if you are able to sometimes boot up your computer normally and are only encountering this error momentarily.


Method 11: Repair Corrupted System Files
It also possible in some situations that certain system files might have been corrupted due to a storage failure or due to some other reason. Therefore, in this step, we will be performing a complete repair of the corrupted system files and then we will check to see if doing so fixes this issue. For that:
- Press “Windows” + “R” to open the Run prompt.
- Type in “cmd” and then press “Shift” + “Ctrl” + “Enter” to launch the command prompt with admin privileges.
- Type in the following commands one by one and press “Enter” after each to successfully run an SFC scan and a DISM Scan on your computer.
DISM /Online /Cleanup-Image /RestoreHealth sfc /scannow
- Restart your computer completely once these scans are completed.
- Check to see if by performing these scans, you were able to fix this issue on your computer.

Method 12: Run Windows Startup Repair
Startup Repair is capable of diagnosing and fixing the found issues. For example, it can automatically scan system files, registry settings, configuration settings, etc. and try to fix the problem on its own. Startup Repair is especially useful when your computer is unbootable. Since your computer fails to boot, Windows can boot into WinRE automatically. While, if it doesn’t appear, you can interrupt the boot process three times in a row, and then the WinRE screen appears. Alternatively, if you have a bootable USB medium, you can also set your computer to boot from it and go to Repair your computer to enter WinRE.
After you have successfully booted into the Windows Recovery Environment, click on the “Troubleshoot” option, and from there, select the “Advanced Options” screen. Inside the advanced options, select the “StartupRepair” button to successfully initiate the Startup Repairing process. Windows will begin to diagnose your computer automatically. When the process ends, your computer will restart automatically. You can wait to see whether it can boot successfully.

Solução alternativa: certifique-se de que nenhum dispositivo adicional esteja conectado antes de acessar a linha de comando ou o Reparo de inicialização. É melhor tentar reiniciar com o menor número possível de dispositivos e unidades externas conectadas ao computador. Isso garantirá que nada do que foi adicionado recentemente ao computador não esteja causando esse problema. Seria melhor desconectar todas as unidades USB recentes, CDs, DVDs etc. Isso também inclui um leitor de cartão de memória. Certifique-se de que todas as unidades externas e chaves USB ou unidades de salto USB foram desconectadas e tente novamente.