O Steam Cloud oferece uma maneira fácil e transparente de salvar os dados do jogo em um sistema de armazenamento remoto. Os arquivos especificados na configuração do Auto-Cloud ou se eles forem gravados no disco serão automaticamente replicados para os servidores de nuvem Steam (usando a API Cloud) após o jogo existir.

Isso é particularmente útil se o usuário trocar de computador. O andamento do jogo será retomado pela API Cloud ou pela leitura direta do disco. Os arquivos serão baixados automaticamente antes do jogo ser iniciado, pois você já deve ter inserido suas credenciais do Steam. A principal tarefa do Steam Cloud é garantir que todos os arquivos sejam sincronizados em todos os computadores que o usuário está usando.
Os usuários têm a opção de desabilitar toda a sincronização em nuvem presente nas configurações do Steam no cliente. Os usuários também têm a flexibilidade de desativar a sincronização em nuvem por jogo. Mas antes de prosseguir com as soluções, atualize o cliente Steam para a compilação mais recente.
Quais são os diferentes métodos de utilização da nuvem Steam?
O Steam oferece dois métodos diferentes para utilizar a Steam Cloud.
A primeira é a API Steam Cloud. A API Cloud fornece uma série de funções que permitem que você integre diretamente a Steam Cloud ao seu jogo. A API Cloud também faz a tarefa de isolar arquivos individuais do usuário Steam uns dos outros e também fornece melhor controle sobre a nuvem Steam como um todo.
O segundo é o Steam Auto-Cloud. Esse recurso foi projetado principalmente para jogos legados em que era difícil usar a API Cloud. É uma maneira rápida de começar a usar o Steam Cloud, mas não tem a flexibilidade e o poder que a API Steam Cloud oferece.
É recomendado pelos desenvolvedores usar a API Cloud em vez do Steam Auto-Cloud, pois fornece integração e personalização mais profundas e eficazes. Ele permite que você aproveite ao máximo a nuvem Steam.
Como faço para resolver um conflito de nuvem Steam?
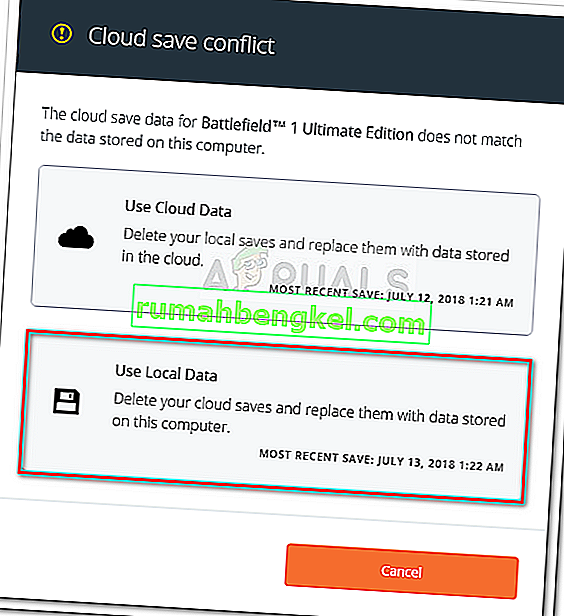
Um conflito do Steam Cloud ocorre quando o conteúdo do Steam Cloud não corresponde aos arquivos de jogo locais armazenados no disco rígido. Isso pode ocorrer na máquina que você estava usando naquele momento ou pode ter ocorrido em outra máquina anteriormente. Como o arquivo foi modificado em dois locais diferentes sem a sincronização entre eles, o Steam não pode determinar qual arquivo manter.

Você provavelmente escolherá o arquivo que foi modificado mais recentemente. Isso significa que os desenvolvimentos mais recentes em seu jogo serão salvos. Você deve inspecionar cuidadosamente os dados visualizados na janela. Reveja cuidadosamente a data e a hora do contexto e corresponda à última vez que você jogou no Steam. Este contexto pode ajudá-lo a determinar qual versão manter.
Observe que jogar no modo offline evitará que seus jogos sincronizem e esta é a causa mais provável do conflito do Steam Cloud.
E se o Steam não conseguir sincronizar os arquivos com a nuvem?
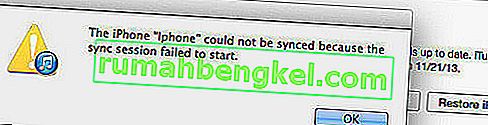
Este erro indica que o Steam não conseguiu sincronizar seus arquivos locais com o Steam Cloud. Pode ser um problema temporário que os servidores Steam Cloud podem estar enfrentando. Você pode verificar o status do Steam Cloud no site do Steam para garantir que o problema está do lado deles.

Se o serviço de nuvem Steam está instalado e funcionando perfeitamente, isso significa que o problema está no seu fim. Você pode verificar sua conexão Steam e solucionar problemas. Você também pode verificar se está tendo problemas para sincronizar com o Steam Cloud.
Se você ignorar a mensagem e clicar em “Play game”, isso pode causar um conflito potencial entre seus arquivos locais e a nuvem Steam. Também pode resultar em progresso e perda de dados do jogo.
E se eu perder um arquivo ou progresso após mudar para um computador diferente?
Se você está perdendo seu progresso mais recente e checou duas vezes se o jogo está usando a nuvem do Steam usando as configurações, isso significa que o Steam não conseguiu sincronizar seus dados com sucesso ou a sincronização resultou no upload de seus dados anteriores para o Nuvem.
É possível que seu arquivo original ou o progresso ainda esteja na máquina mais antiga e não tenha sido possível sincronizar. É possível, se você iniciar o Steam naquele computador, seu progresso será mostrado. Em caso afirmativo, ele será atualizado automaticamente em todas as outras máquinas conectadas à sua conta Steam.
Além disso, muitos jogos não usam a facilidade do Steam Cloud. Você pode verificar a página oficial do jogo se o suporte do Steam Cloud está disponível. Se não estiver e você não tiver acesso à máquina mais antiga, significa que seu progresso foi perdido e não há como recuperá-lo.
Como excluir arquivos armazenados em servidores Steam Cloud?
Steam Cloud é usado para fazer backup de cada progresso do seu jogo para que você não perca seu progresso se acessar o jogo de qualquer outro computador. Você pode confirmar que seu progresso está sendo salvo pela nuvem usando o seguinte método.
Verifique se o backup do seu jogo está sendo feito.
- Abra seu cliente Steam . Abra suas configurações pressionando o botão Steam presente no canto superior esquerdo da janela e selecionando a opção.
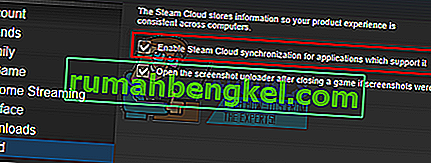
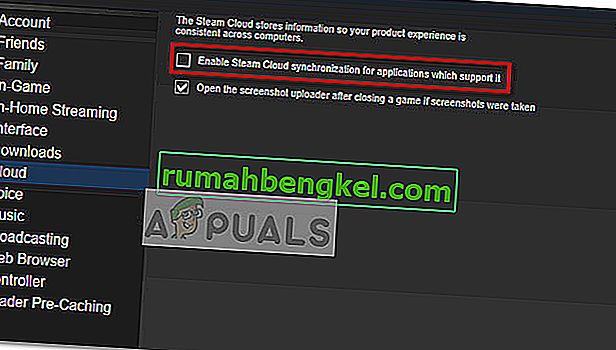
- Abra a guia Nuvem presente no lado esquerdo da tela. Verifique se a opção “ Habilitar sincronização Steam Cloud para os aplicativos que a suportam ” está marcada.
- Em seguida, clique na guia Biblioteca presente na parte superior do cliente Steam. Aqui todos os seus jogos serão listados.
- Clique com o botão direito no jogo e selecione Propriedades . Em seguida, navegue até a guia Atualizações presente na parte superior da janela.
- Aqui na parte inferior da janela, você verá uma opção “ Habilitar sincronização Steam Cloud para [nome do jogo] ”. Certifique-se de que a opção esteja marcada .


Se você tiver ambas as opções habilitadas, significa que o backup do seu jogo está sendo feito pelo Steam Cloud e também podemos excluir os dados.
Qual é o mecanismo de backup?
A primeira coisa que você deve saber é que existem três versões dos dados do jogo salvos
- A versão original é armazenada na pasta AppData ( D1 ).
- A versão da nuvem é armazenada no local Steam / userdata / SteamID / AppID ( D2 ).
- A versão em nuvem armazenada nos servidores em nuvem do Steam ( D3 ).
Observe as anotações (D1, D2, D3) que usamos, pois iremos nos referir muito a elas no futuro.
Quando você inicia o jogo pela primeira vez, D1 é criado automaticamente. Depois de terminar de jogar, os dados do jogo são atualizados em D1 e automaticamente copiados para D2. Depois disso, o D2 é sincronizado com o D3, fazendo o upload de todo o conteúdo do jogo.
Se você iniciar o jogo em outro computador pela primeira vez, se o Steam tiver D3 em seus servidores, mas não detectar D2 no computador, ele fará o download dos dados automaticamente e copiará D3 para D2. O Steam Cloud também baixa automaticamente os dados ausentes sempre que você inicia o Steam.
Em suma, o dado mais importante para nós é D2. Se pudermos manipulá-lo, podemos excluir com sucesso os dados que você deseja excluir.
Nota: Alguns jogos não têm D1 e salvam seus dados diretamente em D2. Enquanto alguns jogos não usam D2 como meio e carregam os dados para a nuvem diretamente de D1.
Quais são os conteúdos dos dados do usuário?
No diretório Steam / userdata, você deve ter uma pasta correspondente ao seu SteamID (você verifica qual é o seu Steam ID lendo nosso artigo sobre ele). Depois de abri-lo, haverá pastas feitas para cada jogo que você jogar. Eles serão identificados usando seu AppID (AppID pode ser facilmente verificado visitando o jogo na loja Steam e extraindo-o do URL). Nesta pasta do jogo, você encontrará duas entidades.
- remotecache.vdf: este arquivo descreve todas as propriedades dos arquivos contidos na pasta remota.
- Pasta remota . Ele contém todos os arquivos que são sincronizados com seu servidor Steam Cloud.
Exclusão de dados da nuvem
Nesse método, estaremos seguindo duas etapas importantes. Iremos primeiro trazer a notificação de conflito do Steam Cloud e, em seguida, excluir os arquivos do Cloud.
Observe que você teria que seguir estas etapas jogo a jogo para excluir todo o conteúdo da nuvem Steam.
Primeiro, precisamos deletar a pasta AppID do seu diretório Steam. Depois de reiniciar o computador e o Steam, o Steam recriará automaticamente a pasta. Precisamos realizar esta etapa para garantir que o Steam Cloud está funcionando perfeitamente e podemos prosseguir com a parte de exclusão.
- Abra seu diretório Steam . O local padrão para a instalação do Steam é
C: \ Arquivos de programas (x86) \ Steam
- Search for a folder of AppID and Delete it. Then restart your computer and Steam. Start a game for a few minutes. Make sure that you have a working internet connection.
- Navigate back to the Steam directory and check if the AppID folder is back. If it is, it is confirmed that your Steam Cloud is working perfectly and we can proceed with the method.
Bringing Up Steam Cloud Conflict Dialogue
The first part of the solution is probably the most difficult. To delete all your Steam Cloud data, it is necessary to bring the conflict dialogue. Without it is not possible to delete the data present in your Cloud. Steam Cloud conflict occurs when the Cloud files differ from the data present on your hard drive.
There are two methods to bring about this conflict:
Method 1:
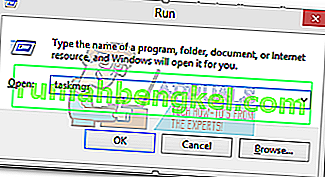
- Make sure that your Steam Cloud is enabled by following the steps mentioned above. Exit Steam completely by ending all the processes starting with Steamclientbootstrapper using the task manager.
- Now will alter all the files in the location
Steam\userdata\SteamID\AppID\remote
The objective is to make sure that all the files are different from those uploaded to the Steam cloud. We can’t simply delete the files from this location as Steam will automatically notice that the files are missing and download the same ones from the Cloud servers. We can achieve our task by corrupting them and making them 0-byte files.
- Navigate to
Steam\userdata\SteamID\AppID\remote
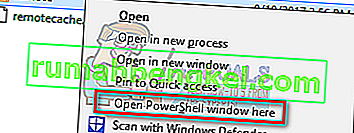
- Now hold shift and right-click on your remote folder. Select the option “Open PowerShell window here”.
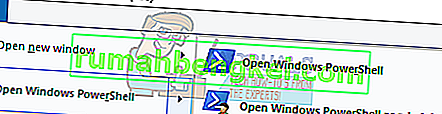
- You can also open PowerShell when in the folder by clicking the File option present at the top left side of the screen and selecting “Open Windows PowerShell as administrator”.
- Once PowerShell is opened, type the exact text written below


clc –path “C:\Program Files (x86)\Steam\userdata\SteamID\AppID\remote\*"
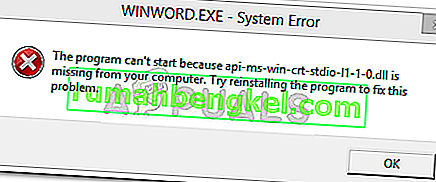
If you fail to write the correct code, you will get an error like this

If you correctly type in the line there will be no confirmatory message and you will get a window like this.

Start your Steam and there will be the conflict windows present on your Steam client.
Method 2:
This is an easier method as compared to the earlier one but it isn’t that efficient.
- Open your Steam client. Open its Settings by pressing the Steam button present at the top left corner of the window and selecting the option.
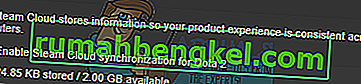
- Open the Cloud tab present on the left side of the screen. Uncheck the option “Enable Steam Cloud synchronization for the applications which support it”.

- Now navigate to your Stream directory as you did earlier and delete all files present in the folder of AppID. The file path for deletion is
Steam\userdata\SteamID\AppID.
- Now start the game to make new and different files in the file location.
- Exit the game and Steam completely by ending all Steam processes in the task manager (end steamclientbootstrapper first).
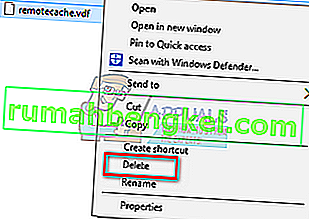
- Now delete the remotecache.vdf file present in the location
Steam\userdata\SteamID\AppID
- Start your Steam.
- Head over to the client’s Settings and enable the cloud.

Now a Steam conflict dialogue will come forth and we can proceed with the remaining method.
Deleting Cloud files
Once the Cloud conflict error is forth, don’t click any option and follow the instructions below.
- Navigate to the following file path
Steam\userdata\SteamID\AppID
and delete all the files in it. There will be two files (remote folder and remotecache.vdf). Delete both of them.
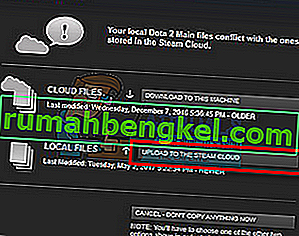
- Now go back to the conflict window and select the option of “Upload to the Steam Cloud”. Now Steam will sync your AppID folder while there will be nothing in it and the previous data on your Steam Cloud will be deleted.
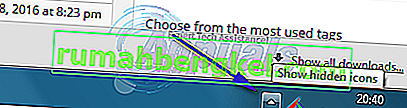
- Now the game will start automatically but it will create new files that will be synced to your Steam cloud when you close it. We can prevent it from happening by pressing alt + tab. This will open the open windows on your screen. Select the Steam client from the list of windows.

- Once you are in the Steam client, open the client’s Settings. Navigate to the Cloud tab and uncheck the line which enables cloud.

- Now return to the game and exit. No files will be synced to your Steam cloud.
- Exit Steam and delete the AppID folder as we did before.


How to Make Sure If it Worked?
Remember how we checked at the beginning of this method if the Steam Cloud was running as expected by deleting the AppID folder and checking if it was made again. If there is no file present in the Steam cloud, there will be no file downloaded to your computer.
- Enable the Steam cloud as we did in the guide.
- Exit Steam completely by using the task manager.
- Delete the AppID folder (if you didn’t in step 2).
- Now check D3 (these are the cloud files) and compare them with D2 (local files on your computer). If there is nothing in D3, there will be nothing in D2 too!
- Check the following directory Steam\userdata\SteamID
No new AppID folder would have been created.
You can also check by logging Steam in on another computer and checking if the files exist.
If you make it till here without any problems, you have successfully deleted all the files on your Steam Cloud.
How to Delete Steam Cloud Saves from OS X
The procedures above can also be replicated on OS X and older Macs to a slight extent. By following the steps below, you will be able to delete your local saves. You can then disable the Steam Cloud synchronization from the Steam application, start a new game and create a few new saves. Then, when you return to re-enable the Steam Cloud synchronization features, the client will ask you which saves do you want to use. You can then choose the new ones which will delete and replace your old saves from the cloud.
To make things even clearer, here’s a step-by-step guide through the whole thing:
- Open your Steam application and go to Steam > Settings via the ribbon at the top of the window.
- In the settings menu, click on the Cloud tab and uncheck the box associated with Enable Steam Cloud synchronization for applications that support it.
- Close Steam completely and open your Finder app.
- Go to Library > Application Support > Steam > SteamApps > Common and open the folder of whichever game you want to delete the save files.
- Next, open the SAVE folder to reveal the saves of the game.
Note: If the location specified above doesn’t land you to the save files, try the following locations but mind the placeholders:
Users / *Your username* /Library / Application Support / *Game Folder* / Game Documents / *Game* / GameSaves Users/ *Your username* / Library / Application Support / Steam / userdata / *GameNumber* / remote Users/ *Your username* / Library / Containers / *Game Folder* / Data /Library / Application Support / *Game* / GameDocuments / *Game* / gamesaves
- Once you manage to identify and delete the local saves from the game you’re targeting, open the Game and create a few new saves.
- Exit the game, open steam and return to Steam > Settings > Cloud. From the cloud tab, re-enable the checkbox next to Enable Steam Cloud synchronization for applications which support it and click the OK button below.
- Steam will ask you whether you want to use the newly created local saves or the ones that you already have on the cloud. Choosing to use the new ones will delete the old saves that you currently have on Steam Cloud.