O Windows 10 é uma das versões mais esperadas do Windows pela Microsoft. Embora o Windows 8 tenha criado uma nova tendência no mundo do SO Desktop, ele tinha alguns problemas de design e desempenho que eram o foco principal da Microsoft no Windows 10. Assim, o Windows 10 Final Build foi revelado em 29 de julho de 2015, para Desktop como bem como smartphones.
Ele incluiu uma série de modificações, mantendo as falhas do Windows 8 em consideração. Na verdade, é uma versão avançada do Windows, mas ainda assim, há uma série de consequências ocorrendo todos os dias com diferentes usuários.
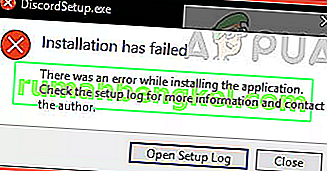
A maior parte dessas consequências são os erros que aparecem ao tentar fazer uma tarefa específica. Várias pessoas receberam uma mensagem de erro ao tentar abrir diferentes softwares e navegadores dentro do Windows 10. Esse erro vem com uma mensagem de erro dizendo que o aplicativo não foi iniciado corretamente (0xc0000005). Clique em OK para fechar o aplicativo . Esse erro geralmente ocorre com navegadores de Internet, mas não se limita a eles. Qualquer aplicativo dentro do Windows pode parar de responder devido a esse erro. Portanto, ele precisa ser consertado para reverter o funcionamento desses softwares essenciais.

12/11/2016: Os usuários relataram que os métodos listados abaixo também funcionam no Windows 7.
Motivo por trás do erro do Windows 10 0xc0000005:
Existem vários motivos conhecidos que fazem com que esse erro atrapalhe as operações de vários softwares no Windows 10. Um dos motivos considerados a principal causa é um programa antivírus de terceiros que causa conflitos com arquivos executáveis e influencia suas operações. Por outro lado, os registros podem ser corrompidos devido a malware e vírus, fazendo com que os programas se comportem de maneira anormal. Às vezes, drivers de hardware ruins também podem ser os culpados por esse erro.
Soluções para corrigir o erro do Windows 10 0xc0000005:
Com base nos motivos mencionados acima, as soluções são diretas. Portanto, siga os seguintes métodos para se livrar dessa mensagem de erro frustrante.
Reparar arquivos corrompidos do sistema
Baixe e execute o Restoro para verificar e restaurar arquivos corrompidos e ausentes a partir daqui , uma vez feito isso, prossiga com as soluções abaixo. É importante garantir que todos os arquivos do sistema estejam intactos e não corrompidos antes de prosseguir com as soluções abaixo.
Método # 1: consertando o programa antivírus
Os programas antivírus podem influenciar os arquivos executáveis de vários programas. Portanto, para corrigir esse problema, é necessário desabilitar o programa antivírus de terceiros para verificar se ele foi o culpado ou não. Observe que a desativação de programas antivírus pode resultar em algumas ameaças sérias ao seu computador quando conectado à Internet.
Você também pode contar com o software de segurança do próprio Windows, ou seja, o Windows Defender . Possui a mesma funcionalidade de qualquer outro antivírus. Você pode desativar o antivírus navegando até suas configurações e desligando o escudo.

Depois de desativado, verifique o erro novamente. Se ainda persistir, vá para o próximo método.
Método 2: Consertando registros
O registro é o banco de dados central do Windows que está constantemente sendo usado pelo seu PC para ajudá-lo a ler muitos arquivos e configurações diferentes que ele precisa para ser executado. Os registros podem ser corrompidos devido a danos a alguns arquivos necessários para empilhar tudo no lugar. Portanto, a maioria dos especialistas recomenda que você certifique-se de fazer o backup do seu Registro e mantenha-o armazenado em um stick USB convencional para que possa reativar o seu Registro no estado anterior em caso de corrupção. Mas, se você não fez o backup do seu Registro, siga estas etapas para corrigir os registros a fim de resolver o erro 0xc0000005 .
1. Baixe o software limpador de registro neste link .
2. Após o download, instale-o usando as configurações recomendadas. Abra o software após a conclusão do processo de instalação.
3. Na interface, clique na guia Registro presente no painel esquerdo e clique no botão identificado como Verificar problemas . Ele começará a procurar erros no registro e quando a pesquisa for concluída, um botão Corrigir problema selecionado será ativado. Clique nesse botão e tudo será consertado.

Método # 3: consertando drivers defeituosos
Drivers são os programas de software que ajudam o computador a se comunicar com o hardware conectado a ele. Então, quando eles estão danificados, o hardware tende a causar falhas . Consertar esses mergulhadores defeituosos pode ajudá-lo de várias maneiras. Siga os passos abaixo.
1. Abra o Gerenciador de dispositivos por pressionar Win + X e selecionando-o na lista.
2. Dentro do Gerenciador de dispositivos, role para baixo para ver se há algum hardware com uma marca amarela. Se houver, clique com o botão direito do mouse e selecione Atualizar software de driver . Se você instalou drivers recentemente, reinstale-os também.

3. Na janela que aparece a seguir, clique em Pesquisar automaticamente software de driver atualizado para permitir que ele procure e instale drivers automaticamente. Caso, se você tenha baixado os drivers manualmente, clique na opção abaixo para navegar e instalá-los. Depois que o processo for concluído, verifique o erro.

Método # 4: consertar BCD
Este método deve ser executado pelos usuários por sua própria conta e risco. Isso funcionou para alguns e não para alguns. Você também precisará reativar o Windows após executar as etapas deste guia.
- Segure a tecla Windows e Pressione X . Escolha Prompt de Comando (Admin)
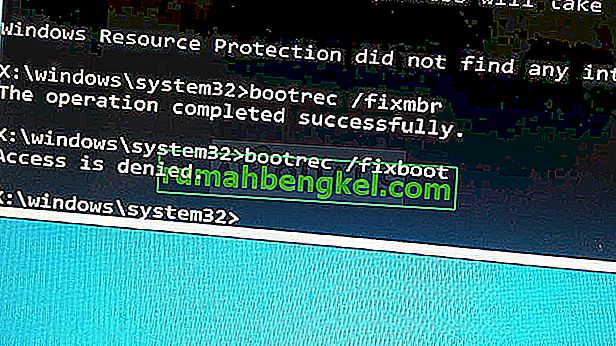
- Digite “ bcdedit” e pressione ENTER. Se o caminho do carregador de inicialização do Windows for xOsload.exe, você precisará remover alguns arquivos e reparar o BCD. Você pode ver isso no campo PATH após executar o comando “bcdedit”.
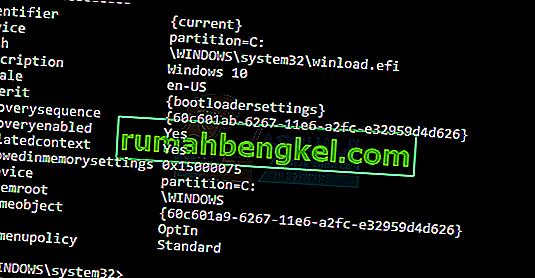
- Feito isso, execute os seguintes comandos abaixo, alguns podem retornar não encontrados, mas ignore os erros e prossiga até o último. Certifique-se de apertar a tecla ENTER após cada comando.

Del D: \ Windows \ System32 \ xOsload.exe Del D: \ Windows \ System32 \ xNtKrnl.exe Del D: \ Windows \ System32 \ Drivers \ oem-drv64.sys atrib c: \ boot \ bcd -h -r -s ren c: \ boot \ bcd bcd.old bootrec / rebuildbcd
Método 5: Verificar atualizações do Windows
As atualizações do Windows geralmente contêm correções para alguns bugs e falhas, mas também são conhecidas por dar lugar a novos problemas nos computadores das pessoas. No entanto, nesta etapa, verificaremos se há atualizações para o seu sistema operacional porque a Microsoft costuma corrigir os problemas decorrentes de suas atualizações. Para fazer isso, siga o guia abaixo.
- Pressione “Windows ' + “ I ” para abrir as configurações do Windows.
- Nas configurações, clique na opção “Atualizações e Segurança” e, à esquerda, selecione a opção “Atualização do Windows” .
- Na próxima tela, clique na opção “Check for Updates” e ele solicitará automaticamente que o Windows verifique se há atualizações disponíveis.

- Depois que a verificação de atualização for concluída, clique no botão “Download” para iniciar o download e a instalação de novas atualizações em seu computador.
- Após a instalação dessas atualizações, verifique se isso corrigiu o problema no seu computador.


Método 6: restaurando o computador
Se você acabou de começar a ter esse problema, ele pode estar sendo acionado devido a uma instalação defeituosa do driver ou até mesmo devido a um aplicativo nocivo que você pode ter instalado em seu computador recentemente. Portanto, nesta etapa, estaremos revertendo o estado do computador para uma data anterior e, esperançosamente, nosso problema deverá ser corrigido se for devido aos motivos mencionados acima. Para fazer isso:
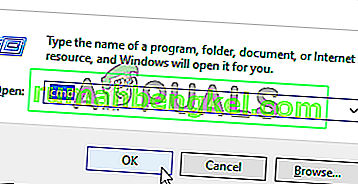
- Pressione “Windows” + “R” para abrir o prompt Executar.
- Digite “rstrui” e pressione “Enter” para abrir a janela de gerenciamento de restauração.
- Clique em “Avançar” e marque a opção “Mostrar mais pontos de restauração” .
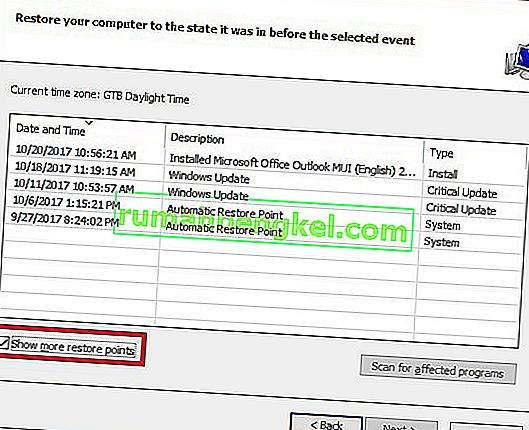
- Selecione um ponto de restauração na lista anterior à data em que o problema começou a ocorrer.
- Clique em “Avançar” novamente e siga as instruções na tela para reverter tudo para a data selecionada.
- Após a conclusão da restauração, verifique se o problema ainda persiste.


Método 7: Habilitar Firewall
É possível, em alguns casos, que o erro esteja sendo acionado porque o aplicativo é suspeito ou pelo menos se foi marcado como suspeito e o Firewall do Windows não está sendo executado em seu computador para validar essa suspeita. Portanto, nesta etapa, verificaremos se o Firewall do Windows está habilitado para eliminar esse erro. Por isso:
- Pressione “Windows” + “R” para abrir o prompt Executar.
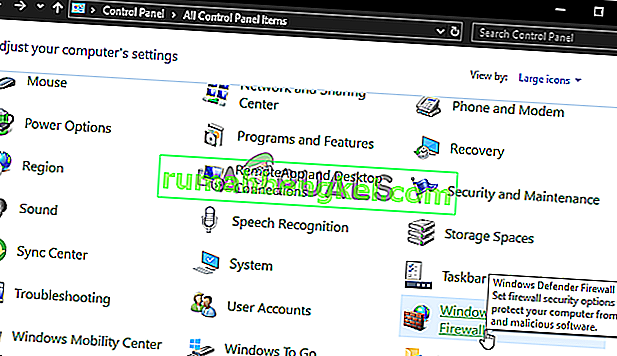
- Digite “Painel de Controle” e pressione “Enter” para abrir a interface clássica do Painel de Controle.
- No Painel de controle, clique na opção “Exibir por:” e selecione o botão “Ícones grandes” .
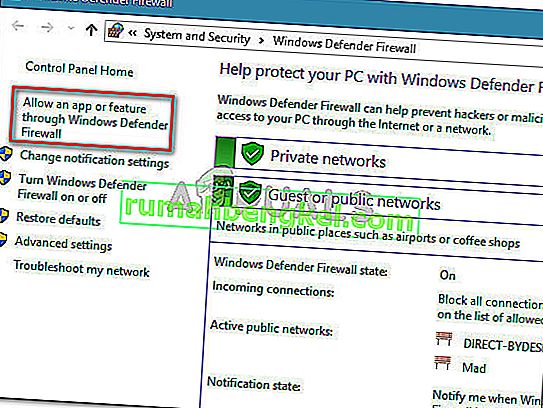
- Após fazer esta seleção, clique na opção “Firewall do Windows Defender” para iniciar o Firewall e selecione “Ativar ou Desativar o Firewall do Windows Defender”.
- Certifique-se de verificar “Ativar o Firewall do Windows Defender” para ambas as opções disponíveis para ativar o Firewall.
- Depois de fazer esta seleção, salve suas alterações e feche a janela.
- Depois de fazer isso, verifique se o problema ainda persiste.


Método 8: Execute a varredura SFC
Em algumas situações, você pode ter instalado um driver defeituoso no computador ou, em algum momento, devido a uma falha de armazenamento, alguns arquivos do sistema ou drivers podem estar corrompidos. Portanto, nesta etapa, estaremos executando uma varredura completa do sistema para identificar todos os drivers que não possuem assinaturas ou para corrigir quaisquer anormalidades nos arquivos do sistema. Por isso:
- Pressione “Windows ' + “ R' para abrir o prompt Executar.
- Digite “cmd” e pressione “Shift ' + “ Ctrl ” + “ Enter ” para fornecer permissões de administrador. Executando o prompt de comando
- Digite o seguinte comando dentro do prompt de comando e pressione “Enter” para executá-lo.
sfc / scannow
- Let the computer scan for any broken or corrupted items and it should automatically replace them with working ones.
- Check to see if doing so fixes the error message.

Method 9: Disabling Data Execution Prevention
Data Execution Prevention is a program that prevents certain programs or executables from being able to run on your computer because it suspects that they might be viruses. Due to this prevention, sometimes, as a false alarm, legit applications might also face issues while trying to run on your computer. Therefore, in this step, we will be disabling this setting from the system configuration panel. For that:
- Press ‘Windows’ + “R’ to open the Run prompt.
- Type in “Control Panel” and press “Enter” to launch the classical control panel interface.

- Inside the Control Panel, click on the “View By:” icon and then select the “Large Icons” option.
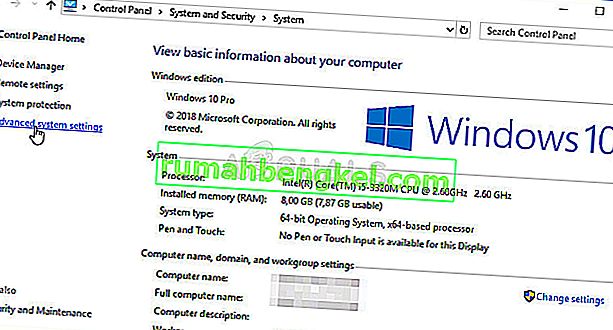
- After selecting Large Icons, select the “System” option.
- Click on the “Advanced System Settings” option on the left side of the screen.
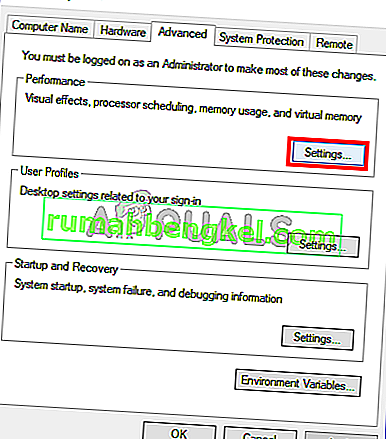
- In the advanced System Settings, click on the “Advanced” tab from the top.
- In the advanced tab, click on the “Settings” option under the “Performance” heading.
- On the next window that opens up, click on the “Data Execution Prevention” tab, and then select the “Turnon DEP for all programs except thoseI Select” option.
- After that, click on the “Add” option and point to the executable of the application that you are facing issues with.
- This way, that application will no longer come under the jurisdiction of the DEP program.
- Check to see if doing so has fixed the issue.


If the above process is unable to fix the issue, it might be because the executable isn’t the only one being affected by the DEP program. Sometimes the DEP might actually be preventing a herd of executables from being run on the computer and to counter this we will be disabling DEP completely.
Disabling DEP completely cannot be done through any Windows setting and it needs to be done manually through the command prompt. Remember to take this step as a last resort because this can in some cases makes your computer more vulnerable to viruses and malware attacks. In order to disable DEP through the command prompt:
- Press “Windows” + “R’ to open the Run prompt.
- Inside the Run prompt, type in “cmd” and then press “Shift” + “Ctrl” + “Enter” to launch in admin mode.
- Inside the command prompt, type in the following command and press “Enter” to execute it on your computer.
bcdedit.exe /set {current} nx AlwaysOff - Once the command has been executed, run the application that you want to and check to see if the error message still persists.
Method 10: Disable Firewall and Windows Defender
In some situations, the executable that you want to run on the computer might actually be blocked by the Firewall and it would not be able to make contact with its servers this way. Therefore, we will have to allow the executable in our Firewall for both public and private networks which should get it working if the Firewall is preventing it.
In addition to that, sometimes the Windows Defender might prevent the application from running on your computer because its local files might be suspicious and not properly signed. This can be due to a false alarm as well so we will be disabling the Windows Defender for the application as well by adding an exclusion. In order to do that:
- Press “Windows” + “R” to launch the Run prompt.
- Type in “ControlPanel” and press “Enter” to launch the classical control panel interface.
- Click on the “View by:” button, select “Large Icons” and then click on the Windows Defender Firewall option.
- Select the “Allow an app orfeature through the Firewall” button on the left pane and then click on the “Change Settings” button and accept the prompt.
- From here, make sure that you check both the “Public” and the “Private” options for the application and its entries.
- Save your changes and exit out of the window.
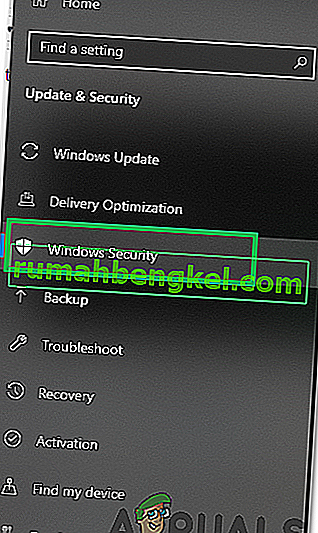
- After that, press “Windows” + “I” to launch the settings and click on the “Updateand Security” option.

- From the left pane, click on the “Windows Security” button and then click on the “Virus and Threat Protection” button.
- Select the “Manage Settings” button under the Virus and Threat Protection Settings heading.
- Scroll down and click on the “Add or Remove Exclusions” button in the next window.
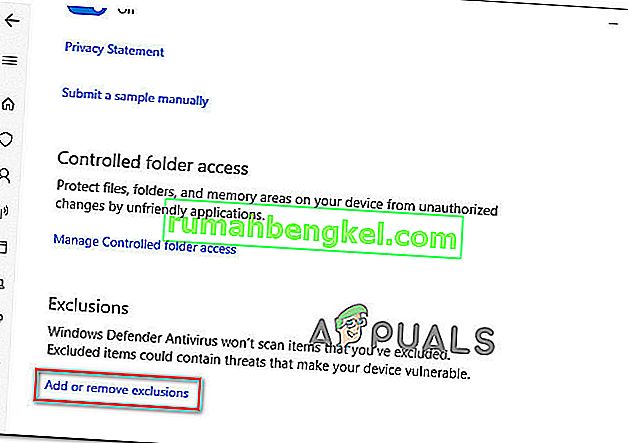
- Click on the “Add an Exclusion” option and select “Folder’ from the File type.
- Make sure to specify the application’s folder with which the issue is occurring and exit out of this window after saving your changes
- Check and see if doing so has fixed the error message.


Method 11: Reinstall Firefox
If you are getting this error while trying to launch Firefox, it might be occurring because the applications haven’t been installed properly on your computer. Therefore, in this step, we will be launching the app management window and uninstalling Firefox after which we will reinstall it completely by downloading it from the Firefox website. For that:
- Press “Windows” + “R” to open the Run prompt.
- Type in “appwiz.cpl” and press “Enter” to open the app management window.

- In the app management window, scroll down and right-click on the “Firefox” application.
- Select “Uninstall” from the list and then follow the on-screen instructions to remove the software from your computer.
- Repeat this step for all instances and bundled applications of the software installed on your computer.
- Make sure to disable any third-party antiviruses at this point to make sure that the software is installed smoothly.
- Head on over to the Mozilla website and click on the download button.

- Click on the downloaded executable and install it on your computer following the on-screen instructions.
- Check to see if doing so has fixed the error message on your computer.


Method 12: Scanning for Malware
It is possible in some cases that the computer has acquired malware that is preventing the user from being able to run all the system functions on their computer. Therefore, in this step, we will be using the default Windows Defender to scan our computer thoroughly for any viruses or malware that might’ve found its way on our computer. For that:
- Press the “Windows” + “I” keys simultaneously on your PC to open the Settings tab.
- Navigate to the Update& Security option and then click on the “Windows Security” button on the left tab.
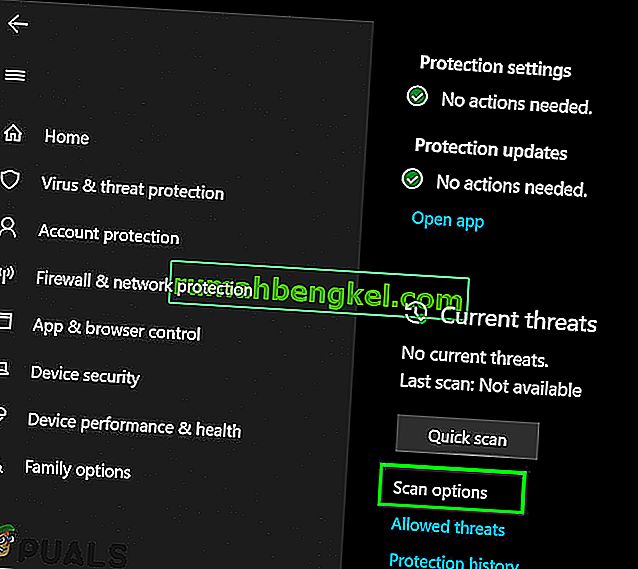
- After that, click on the “Open Windows Security” and select the “Virus and Threat Protection” option.
- After that, click on the “Scan Options” button below the “Quick Scan” window.
- Click on the “Full Scan” option and then hit the button of “Scan Now”.
- Wait for a few seconds while this process gets completed and then finally check if the error gets resolved now.


Microsoft Security Scanner is an additional tool that you can use to test the system for any further viruses and malware because sometimes the default tool isn’t able to perform the scan properly. Therefore, in this step, if the issue still hasn’t been resolved, we will be using the Microsoft Security Scanner to further make sure for any issues.
- Launch your browser and download the Microsoft Security Scanner from here.
- After downloading the executable, run it on your computer and let it install.
- Accept the License Agreement terms and click on “Next”.

- Select “Full Scan” and click on “Next”.
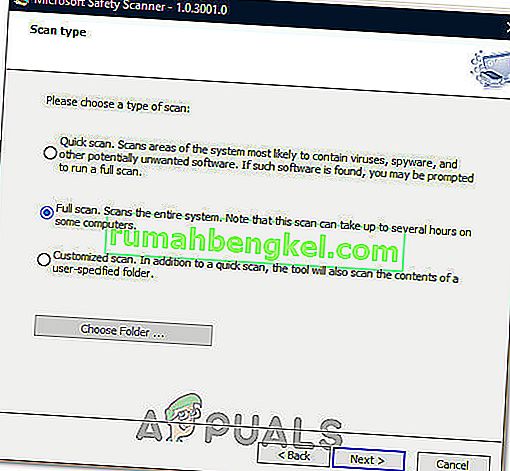
- After you opt for a full scan, the software will start scanning your entire computer to look for any malware or viruses that might’ve disguised themselves as normal executables or applications.
- After this scan has been finished, check to see if the error message still persists.


Method 13: Install Missing Drivers
It is possible in some situations that your device is missing certain drivers due to which this particular issue is being triggered on your computer. Therefore, we will be checking for any missing drivers and then we will check to see if the error is fixed. In order to do this, follow the guide below.
- Download Driver Easy on your computer.

- Run the downloaded executable and install the software on your computer.
- Run the check and see if there are any missing drivers on your computer.
- Install these missing drivers and then install them either manually or automatically using the Software.
- After installing all the missing drivers, check to see if the issue still persists.

Method 14: Reconfigure Registry
It is possible that in some cases, you haven’t properly configured all the registry settings or that you unknowingly configured something incorrectly. Therefore, in this step, we will be reconfiguring our Registry to fix a certain key that sometimes, if misconfigured, causes this particular error on Windows. In order to do this, follow the guide below.
- Press “Windows” + “R” to open the Run prompt.
- Type in “regedit” and press “enter” to launch the registry editor.

- Inside the registry editor, navigate to the following location.
HKLM\SOFTWARE\Microsoft\Windows NT\CurrentVersion\Windows\AppInit_Dlls
- Double click on the “LoadAppInit_DLLs” entry on the right side of the screen.
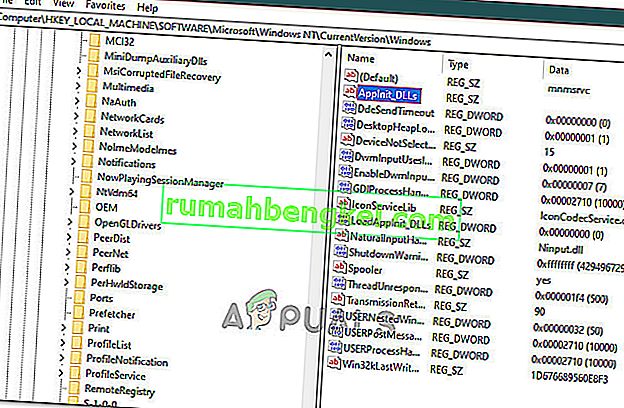
- Change the value of this registry from “1” to “0”.
- Save your changes and exit the registry editor.
- Check to see if doing so has fixed the error.


Method 15: Update Disk Drivers
In some cases, the Disk Drivers that are being used to control your Storage and other Disks installed on the computer might have been outdated due to which the error is being triggered. Therefore, in this step, we will first be opening the Device Management Window and from there, we will be updating these drivers. In order to do so, follow the steps mentioned below.
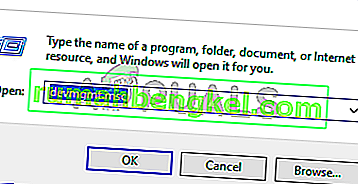
- Press “Windows’ + “R” to open the Run prompt.
- Type in “Devmgmt.msc” and press “Enter” to launch the device management window.
- In the Device Manager, double click on the “DiskDrives” option to expand it.
- Right-click on the storage device listed and select the “Update Driver” option.
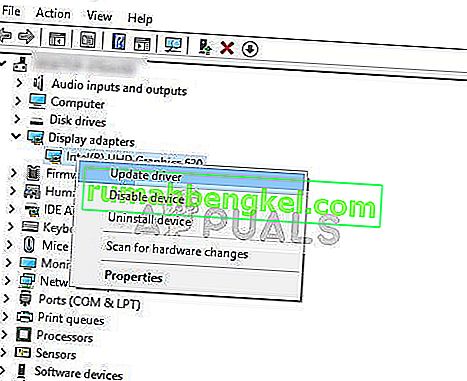
- Select the “Search Automatically for Drivers” option and let the setup search.
- If there are any drivers available, Windows will automatically check for them and install them on your computer.
- Check to see if doing so has fixed the issue.


Method 16: Disabling Automatic Updates and Uninstalling Updates
It is possible in some cases, that this error is stemming from a faulty update install. Microsoft is notorious for pushing out updates that aren’t properly customized to work for all hardware combinations and often go on to break things instead of making them better. Therefore we will make sure that the recent update isn’t installed on our computer.
In order to do this, we will have to first disable automatic updates on our computer and then we will be uninstalling the recently installed updates. Make sure to back up any important data that you don’t want to lose just in case this goes bad.
- Press “Windows” + “R’ to open the Run prompt.
- Type in “service.msc” and press “Enter”.

- Scroll through the list and double click on the “Windows Update” service.
- Click on the “Stop” button and then click on the “Startup Type” dropdown.
- Select “Disabled” from the list and select the “Apply” button from the window.
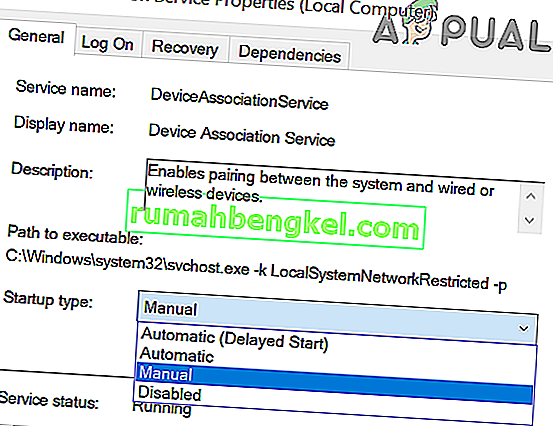
- Click on “OK” to close out of this window.
- Check to see if doing so has stopped your computer from updating.


After stopping the computer from updating, we will now be uninstalling the recent updates that have been installed on your computer. For that:
- Press “Windows” + “I” buttons to open the settings.
- In settings, click on the “Update and Security” option and then select the “Windows Update” button from the left pane.

- In the Windows Update, click on the “View Update History” option.
- In the Update History, click on the “Uninstall Updates” option and it should take you to the uninstallation screen where all the recently installed updates will be listed.
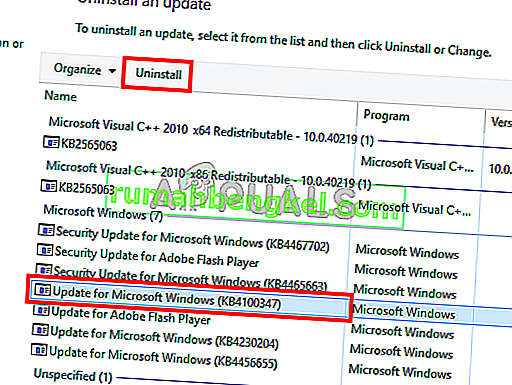
- From the list, right-click on the update that was installed recently and caused this error on your computer.
- Right-click on this update and select the “Uninstall” button to remove it completely from the computer.
- Follow through with the on-screen instructions.
- Check to see if uninstalling has fixed this issue.


Additional Fixes:
- In addition to some of the recommendations given above, you should try to check if there are any bad memory modules (RAM) installed on your computer which can be a cause of this.
- Além disso, certifique-se de verificar se você não fez overclock de sua RAM para um nível além do limite recomendado. Se tiver feito isso, tente restaurar os padrões de fábrica e verifique se isso corrige o problema.